I have been wanting to make these sweet little birdseed cakes for ages.
YAY, I finally remembered to buy gelatine at the supermarket… it has been on my shopping list for months but, alas, it was one of those things I just could NOT remember. At last, as I was looking through the spice isle for Cream of Tatar (to make playdough), GELATINE! suddenly popped into my head.
We have made the peanut-butter-on-pine-cone-feeders many times before and so were very excited to try something different. K is not a peanut butter person and it has always worried her that perhaps some birds wouldn’t like peanut butter either. Sweet child.
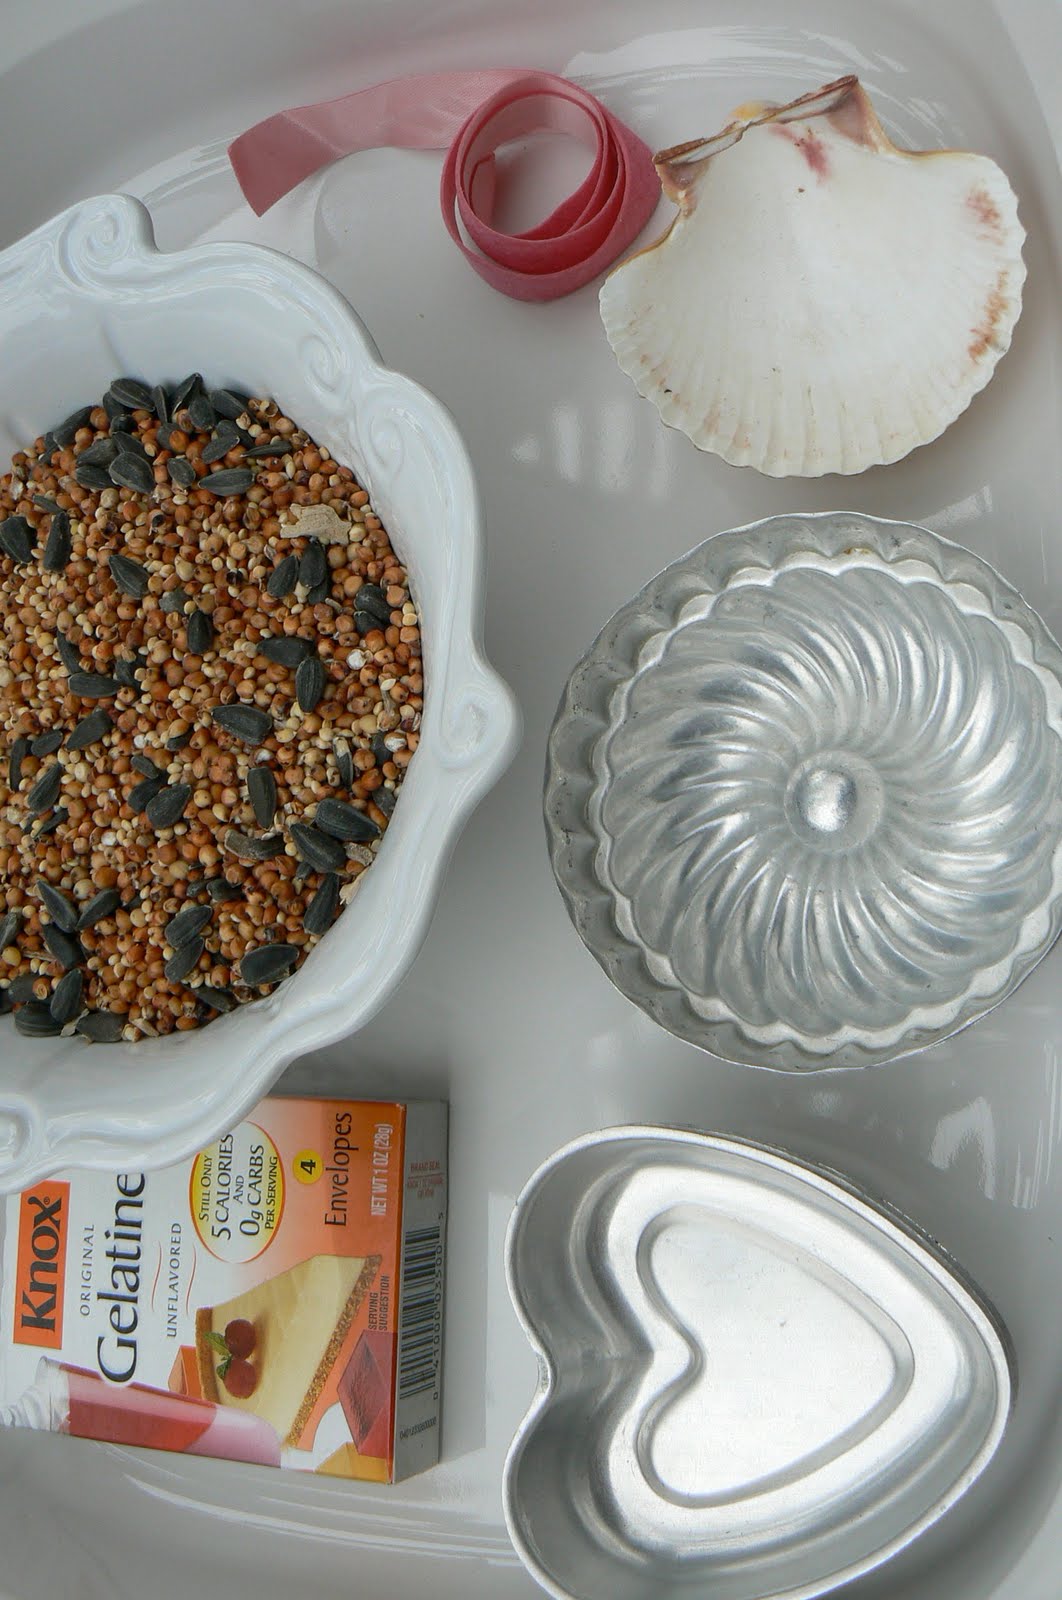
Here are the simple ingredients;
1 oz Gelatine
Birdseed
Boiling Water
Molds
Yarn or string (for hanging loops)
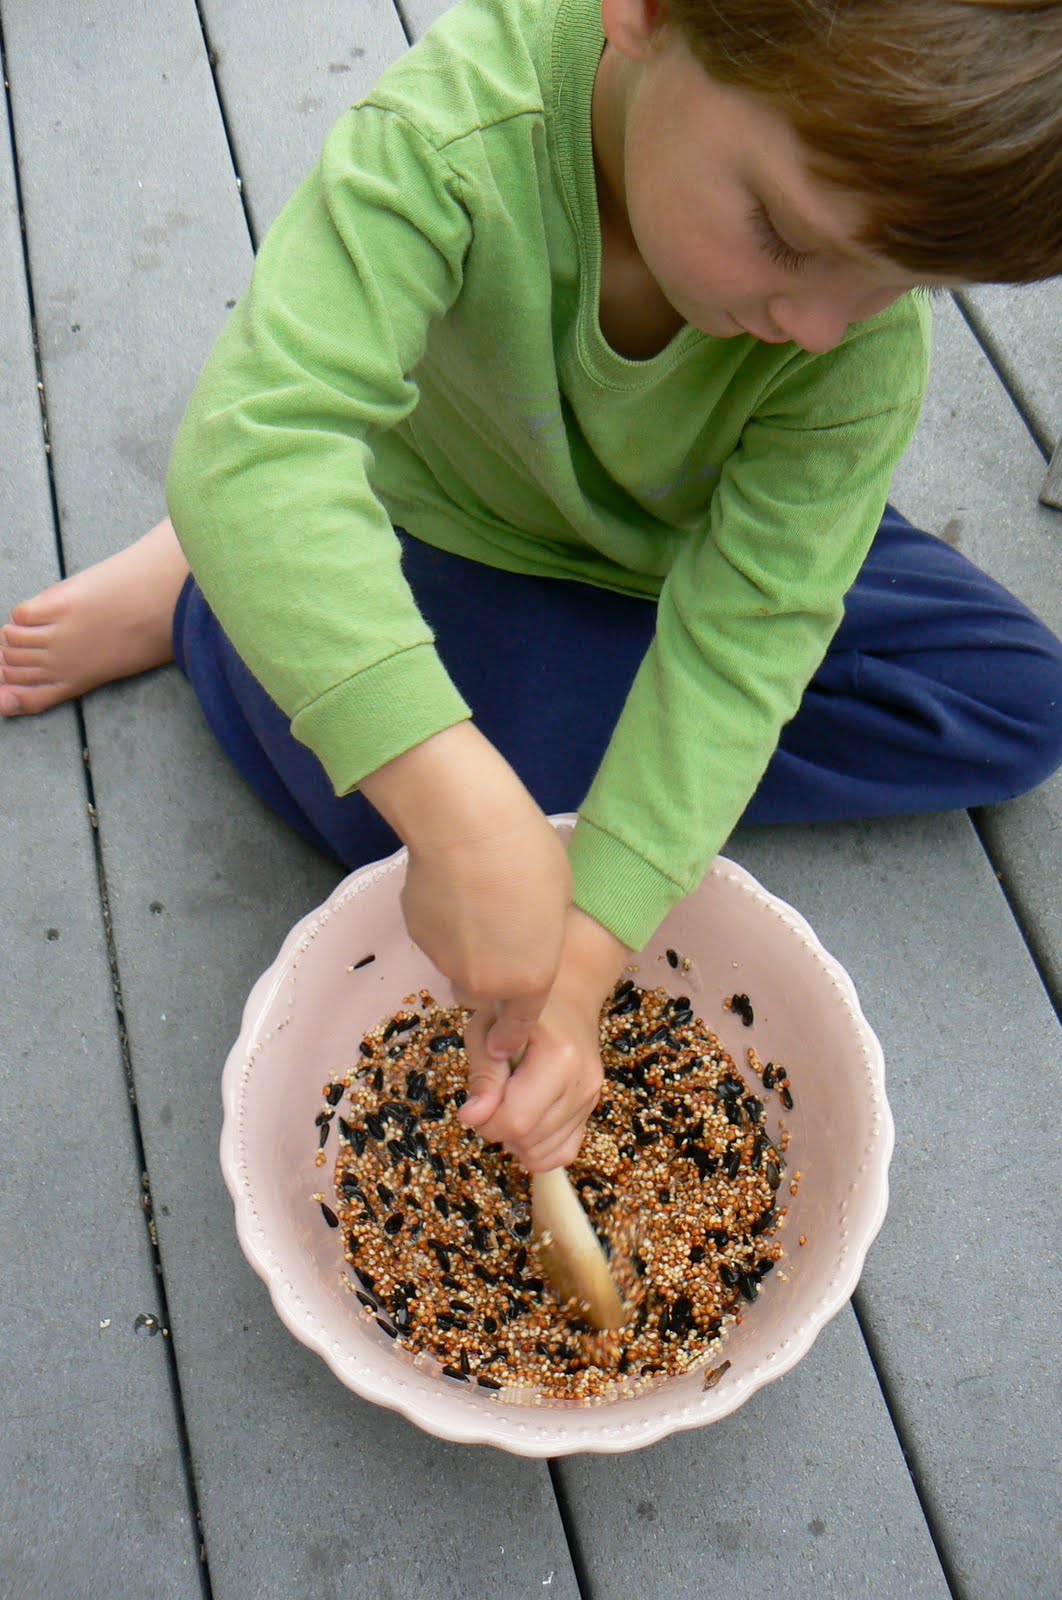
 In a mixing bowl, add 1 oz Gelatine and 1 cup of boiling water and stir until all of the Gelatine has dissolved.
Then add birdseed. We used about 3 cups but this amount will depend on the kind of birdseed you use. You want the mixture to be pretty stiff.
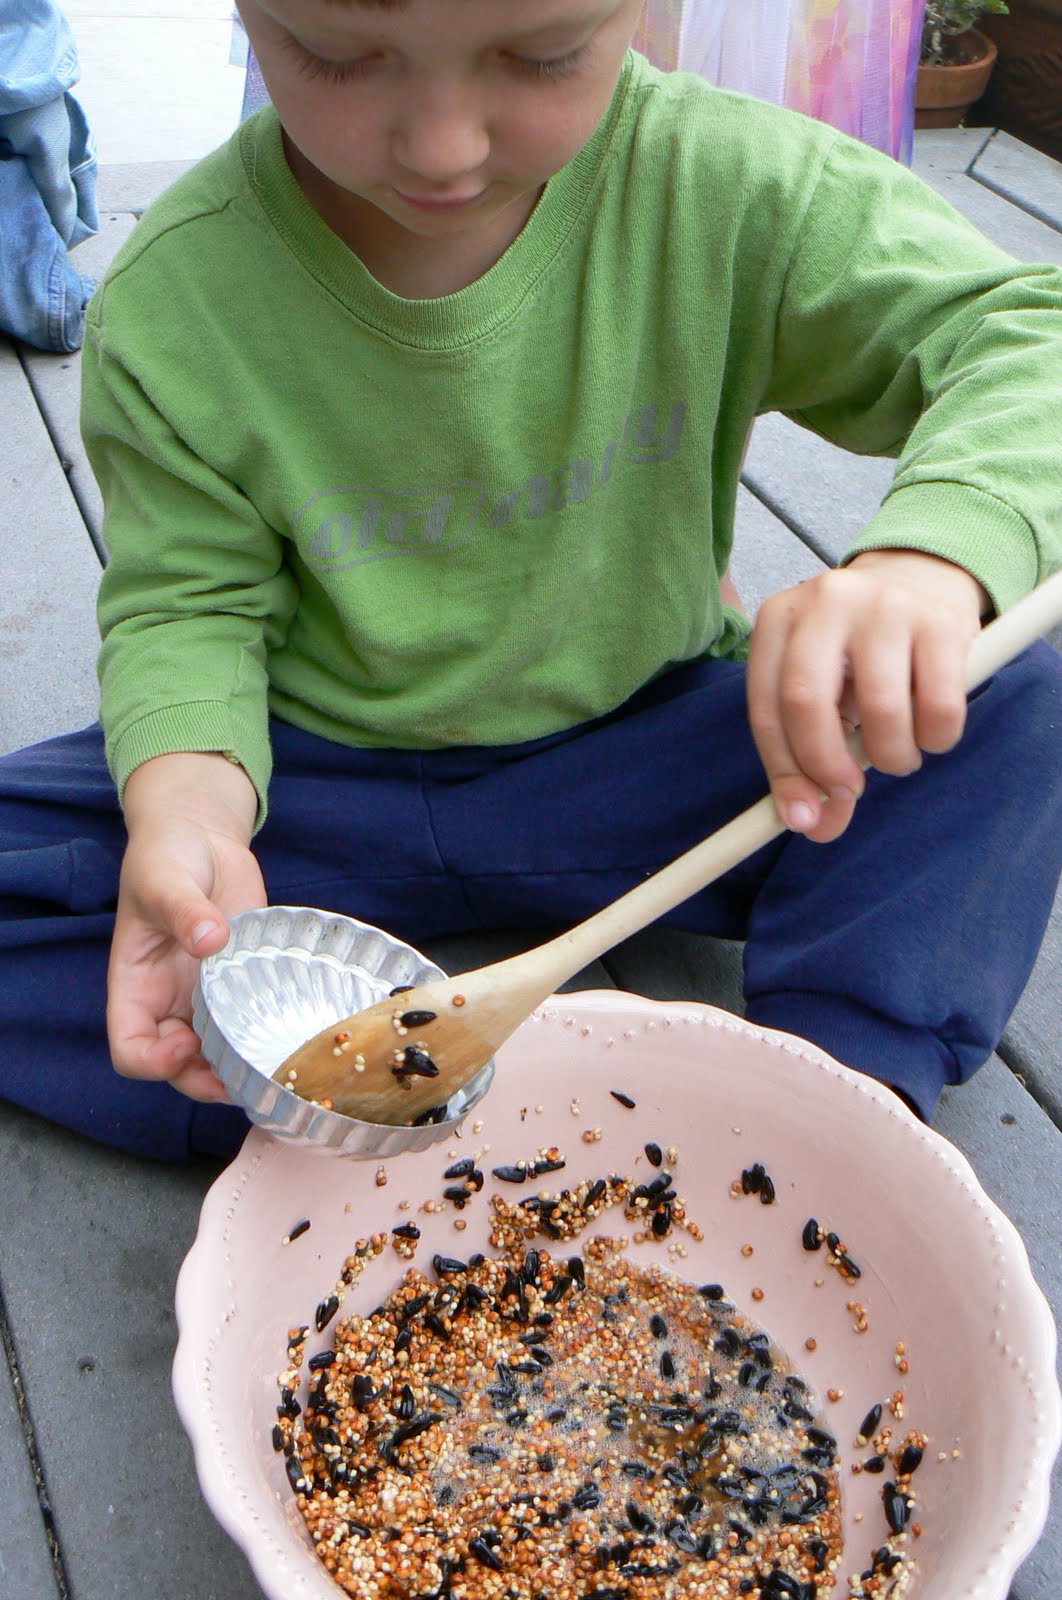
Spoon the mixture into your molds.

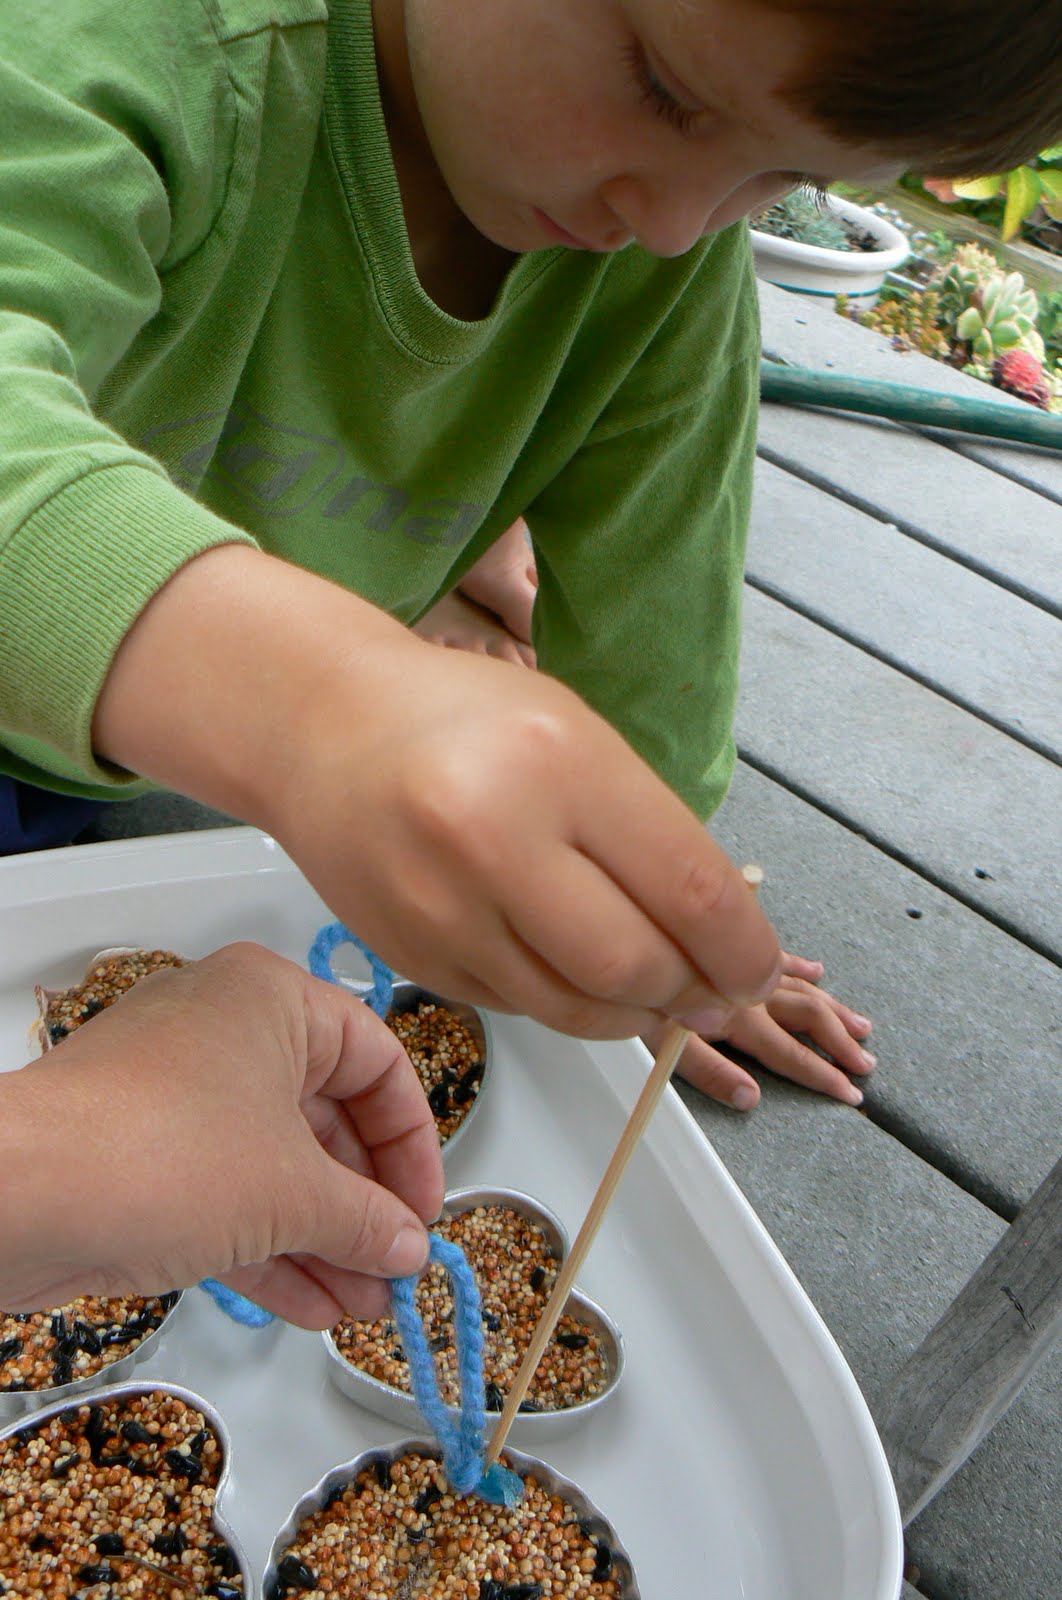
Cut your yarn for the hanging loops, knot one end and stick the knot into each seed cake. Cover the knot with a little birdseed mixture to make sure it will set firmly.
Now, you have to wait for the Gelatine to set. This takes quite a while, so amuse yourself in the meantime by making yarn earrings…

You can leave the cakes at room temperature to set. We, however, wanted them to set as quickly as possible, so we put them in the fridge.

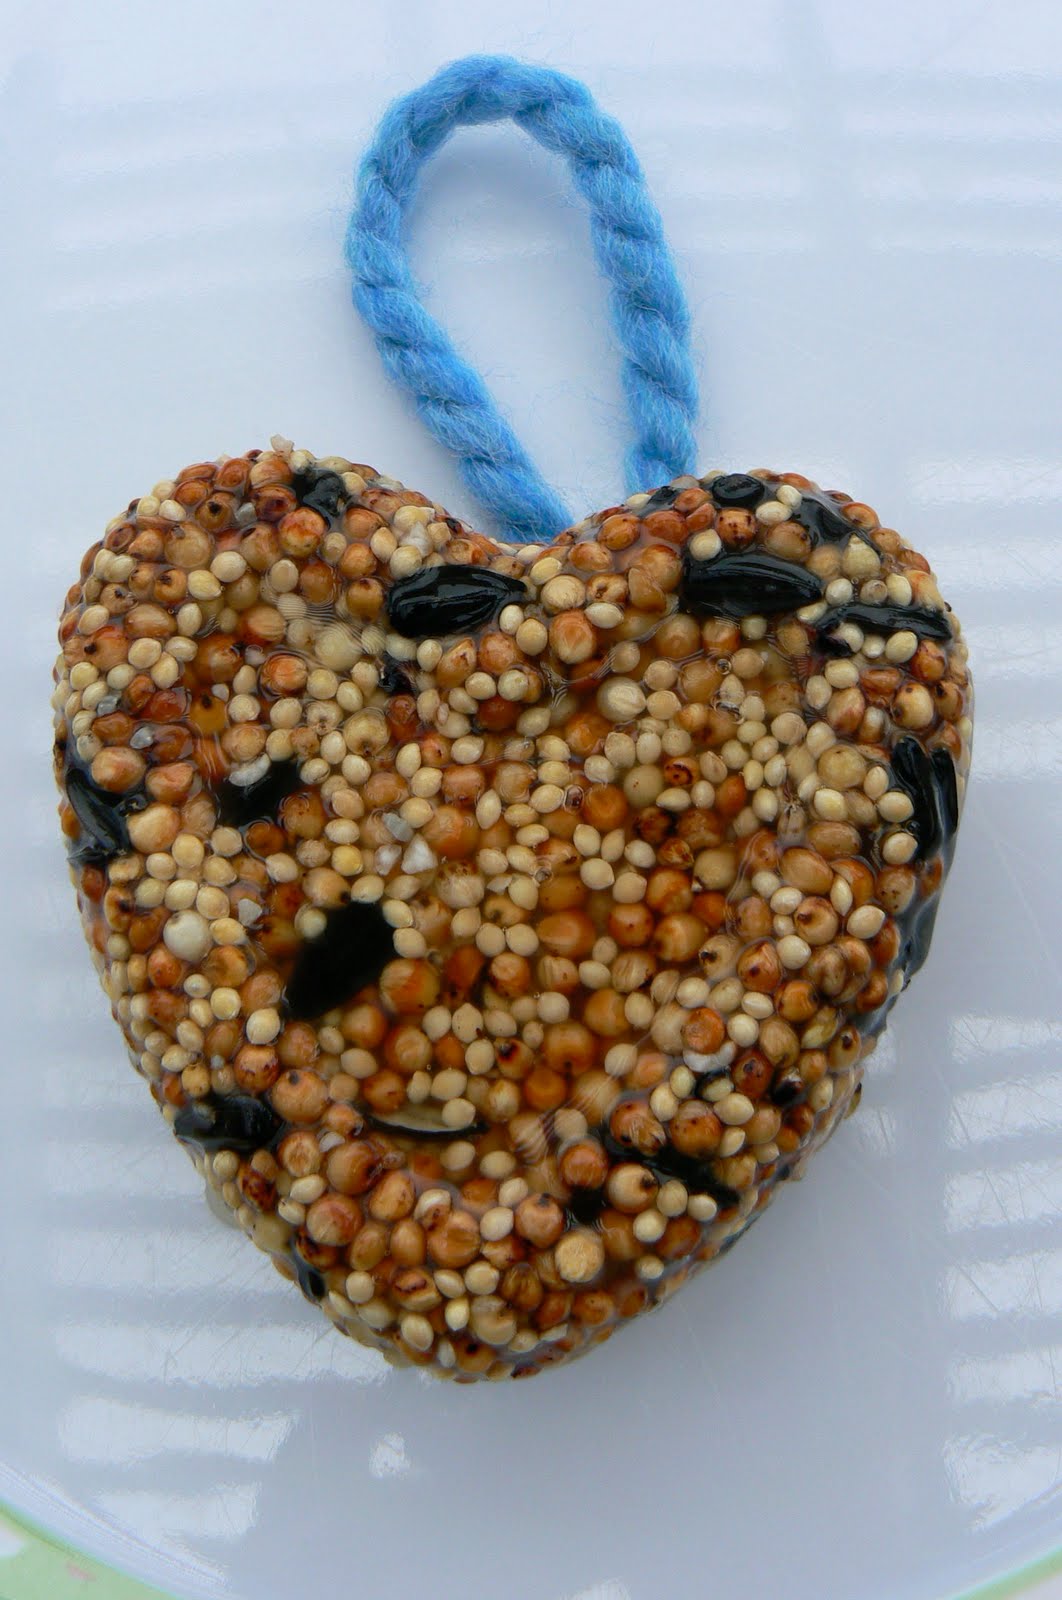
To get the sweet little cakes out of the mold, dip the mould quickly into hot water. They should slide right out.

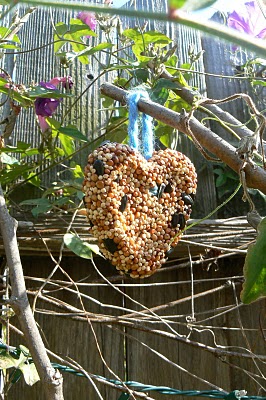
Voila! Birdseed cakes for the birds.
We have hung ours all over our garden and have taken great delight in watching the birds twitter around them. Our birds are VERY happy with their new treats!

Blessings and magic,
Donni


45 Responses
adorable!!
Thanks for sharing these! This has been on my long lost to-do list. I think I have all the ingredients at home. Yippee! A great project to do with my girls. :)
I’ve been meaning to make them forever, too!
(‘Cept mine calls for different ingredients.)
Yay!! for getting it done! So, so sweet.
Those are so sweet and I would really like to offer some up to our birdies.
So cute! Just today my littles were asking about making bird feeders. My youngest has a peanut allergy so the timeless peanut butter on a pinecone feeders are out but this idea is great!
so cute and such fun .. must remember to pick up the supplies xx
I am digging this project! I am heading to the store this afternoon and have just added gelatin to my list. Awesome! Thanks :)
Adorable.
Great idea!
Always a fun project going on at your house! Lucky children! love, Beth
these are adorable. I have recently decided to start a mama n me crafting get together with my girlfriends once a week and I think this craft will be one of our first. it’s simple enough for all ages and all levels of ability. I will be posting our sessions so I will link back here if you don’t mind. By the way super earings, their soo shiek and fashionable I just love them (wink wink) Tell her fabulous job!!
Blessings,
Kat
forloveofmyoceans.blogspot.com
Those are so neat! We are definitely going to have to make some for our local birdies. Now I have to find some molds…
Awesome! Funny gelatin has been on my grocery list for a while too and I forgot for about a month then remembered last week to get some! My daughter is allergic to peanut butter so this is a great alternative to the traditional pinecone feeder! I think I am going to do it as a party favor/activity at my daughters b-day party! Thanks!
So cute!! We’ll have to try this.
Love this idea!
a great way to make new bird friends!
Great Idea! Thanks for sharing! Can’t wait to let my children try this!
Oh thank you! These look so much neater than sticky peanut butter. I’ll have to remember this for the next time we make bird treats.
super cute! we are going to try this for sure!
a wonderful idea to do with my birds loving son.
Super great idea!!My daughter will love this.Thanks for sharing with us.
These are darling! My kids would love to make these! thanks for sharing!
We did use this project yesterday with a few modifications. It came out great! You can view our project on my blog
@ forloveofmyoceans.blogspot.com
Thanks again for the idea!
Blessings,
Kat
these are great! What a fun idea. :-)
Thank thank you for sharing this post – it is mid winter here in New Zealand and I never liked the recipes that used lard or peanut butter. I will definitely give this one a try – fortunately I do have gelatine already!!!. Love your blog.
Blessings,
Ali
What a perfect activity to revisit throughout the year. Thanks. I’ll be linking on Facebook.
what an adorable tutorial. can’t wait to try it!!
Looks like he just might be left handed.
I have an award for you..check my blog. Karma to you great mama!
hi, my mom and son would love to do this together . it is a lovely idea! i love your blog, all the tute ideas are so unique, thank you.
I just love this! I hope it is OK, that I took one of your pictures and posted it on blog, with the link to the tutorial. Pia
These turned out so sweet making a lovely gift along with a plate of Christmas cookies. I had some individual size Bundt pans for molds. Then it was easy to put a pretty ribbon through the hole.
Make sure they dry completely before storing or bagging or they will mold. You could also freeze them until ready to feed the birds.
This is exactly what I was searching for! For our wedding, our theme is lovebirds and I was trying to find a GREAT favor. These are perfect!
How far in advance can you make these? I was planning on laying them either in a small birdnest or wrapping them up.
Thank you!!
I’ve been wanting to make these forever too and was actually going to write it on the “Fall List” that we’re making tomorrow so that maybe it’d actually finally get done. What a treat that I just stumbled upon your instructions today! Can’t wait to try it!!
Thanks so much for the tutorial! We are planning to make them for some Christmas gifts.
I just had a question regarding how they hold up once outside. Do they fall apart once the birds start eating them? Do you need a little perch or are the birds able to eat while suspended in the air? (I thought of inserting a small twig for the birds to perch on while feeding).
Thanks! Happy Holidays!
I made several birdie cakes earlier this winter from a much more complicated recipe. I’ve been stalling before replenishing them until I just found your simple one.
Hint: Line your mold with plastic wrap before you fill it. then when they are hardened you can just slip them out and peel off the wrap.
I also use plastic storage containers to make larger cakes and hang them in recycled mesh bags from fruit or ham.The bags can be reused many times.
So I made some of these the other night. And I didn’t let them dry totally but I put them in a little plastic bag and they got moldy. Does anyone know if when they thoroughly dry they get moldy? I am making them ahead of time and sealing them for wedding favors.
Thanks!
How cute!!! Thanks for sharing
Hi Donni-
I included this nature project in our garden post @ theclassroomcreative. I hope it inspires other children to create and learn about nature! thank for sharing- karen & nicolette
Thanks for sharing your recipe! Great gift ides from the kids!!
Your recipe and inspiration are fabulous. Thank you! I made not one, but two batches in one short week and my birds are really enjoying these treats as a rotation from straight seed from the feeders and suet. Plus they are so pretty! BTW, cookie cutters work really well, too! Loved the mesh bag idea from a previous comment. To the query about molding issues … I let mine dry overnight in fair weather and flip them in the morning to dry further. I live in a moist climate, but that seems to do the trick!
Thanks again for such a delightful blog!
can i use honey to bind the seed together please
Hi Jill,
I don’t think honey will work.
xo Donni