A step-by-step tutorial on how to make the cutest little needle felted bunny.
Who’s thinking about bunnies? With Easter just a few days away, I decided to get to work with my needle and wool to make my kids a couple of Easter bunny gifts. Alas, Teddy walked in and caught me in the act of making Kitty’s bunny. He fell deeply in love and now the brown bunny is Teddy’s and the white bunny belongs to Kitty. He was so excited to share his little Easter friend with his sister that all pretense of waiting for Easter Sunday fell by the wayside and both children are cuddling their fluffy bunnies as I write.


I know you’ll fall in love with this little sweetheart too and so have put together a step-by-step tutorial to get you on your way to making one for your own little ones.

Materials:
One needle felting needle and a foam protective mat.
Tan-colored wool (about the length of your needle and about the width of your needle). Pink wool (just a little), white wool (just a little) and dark brown wool (also just a little).

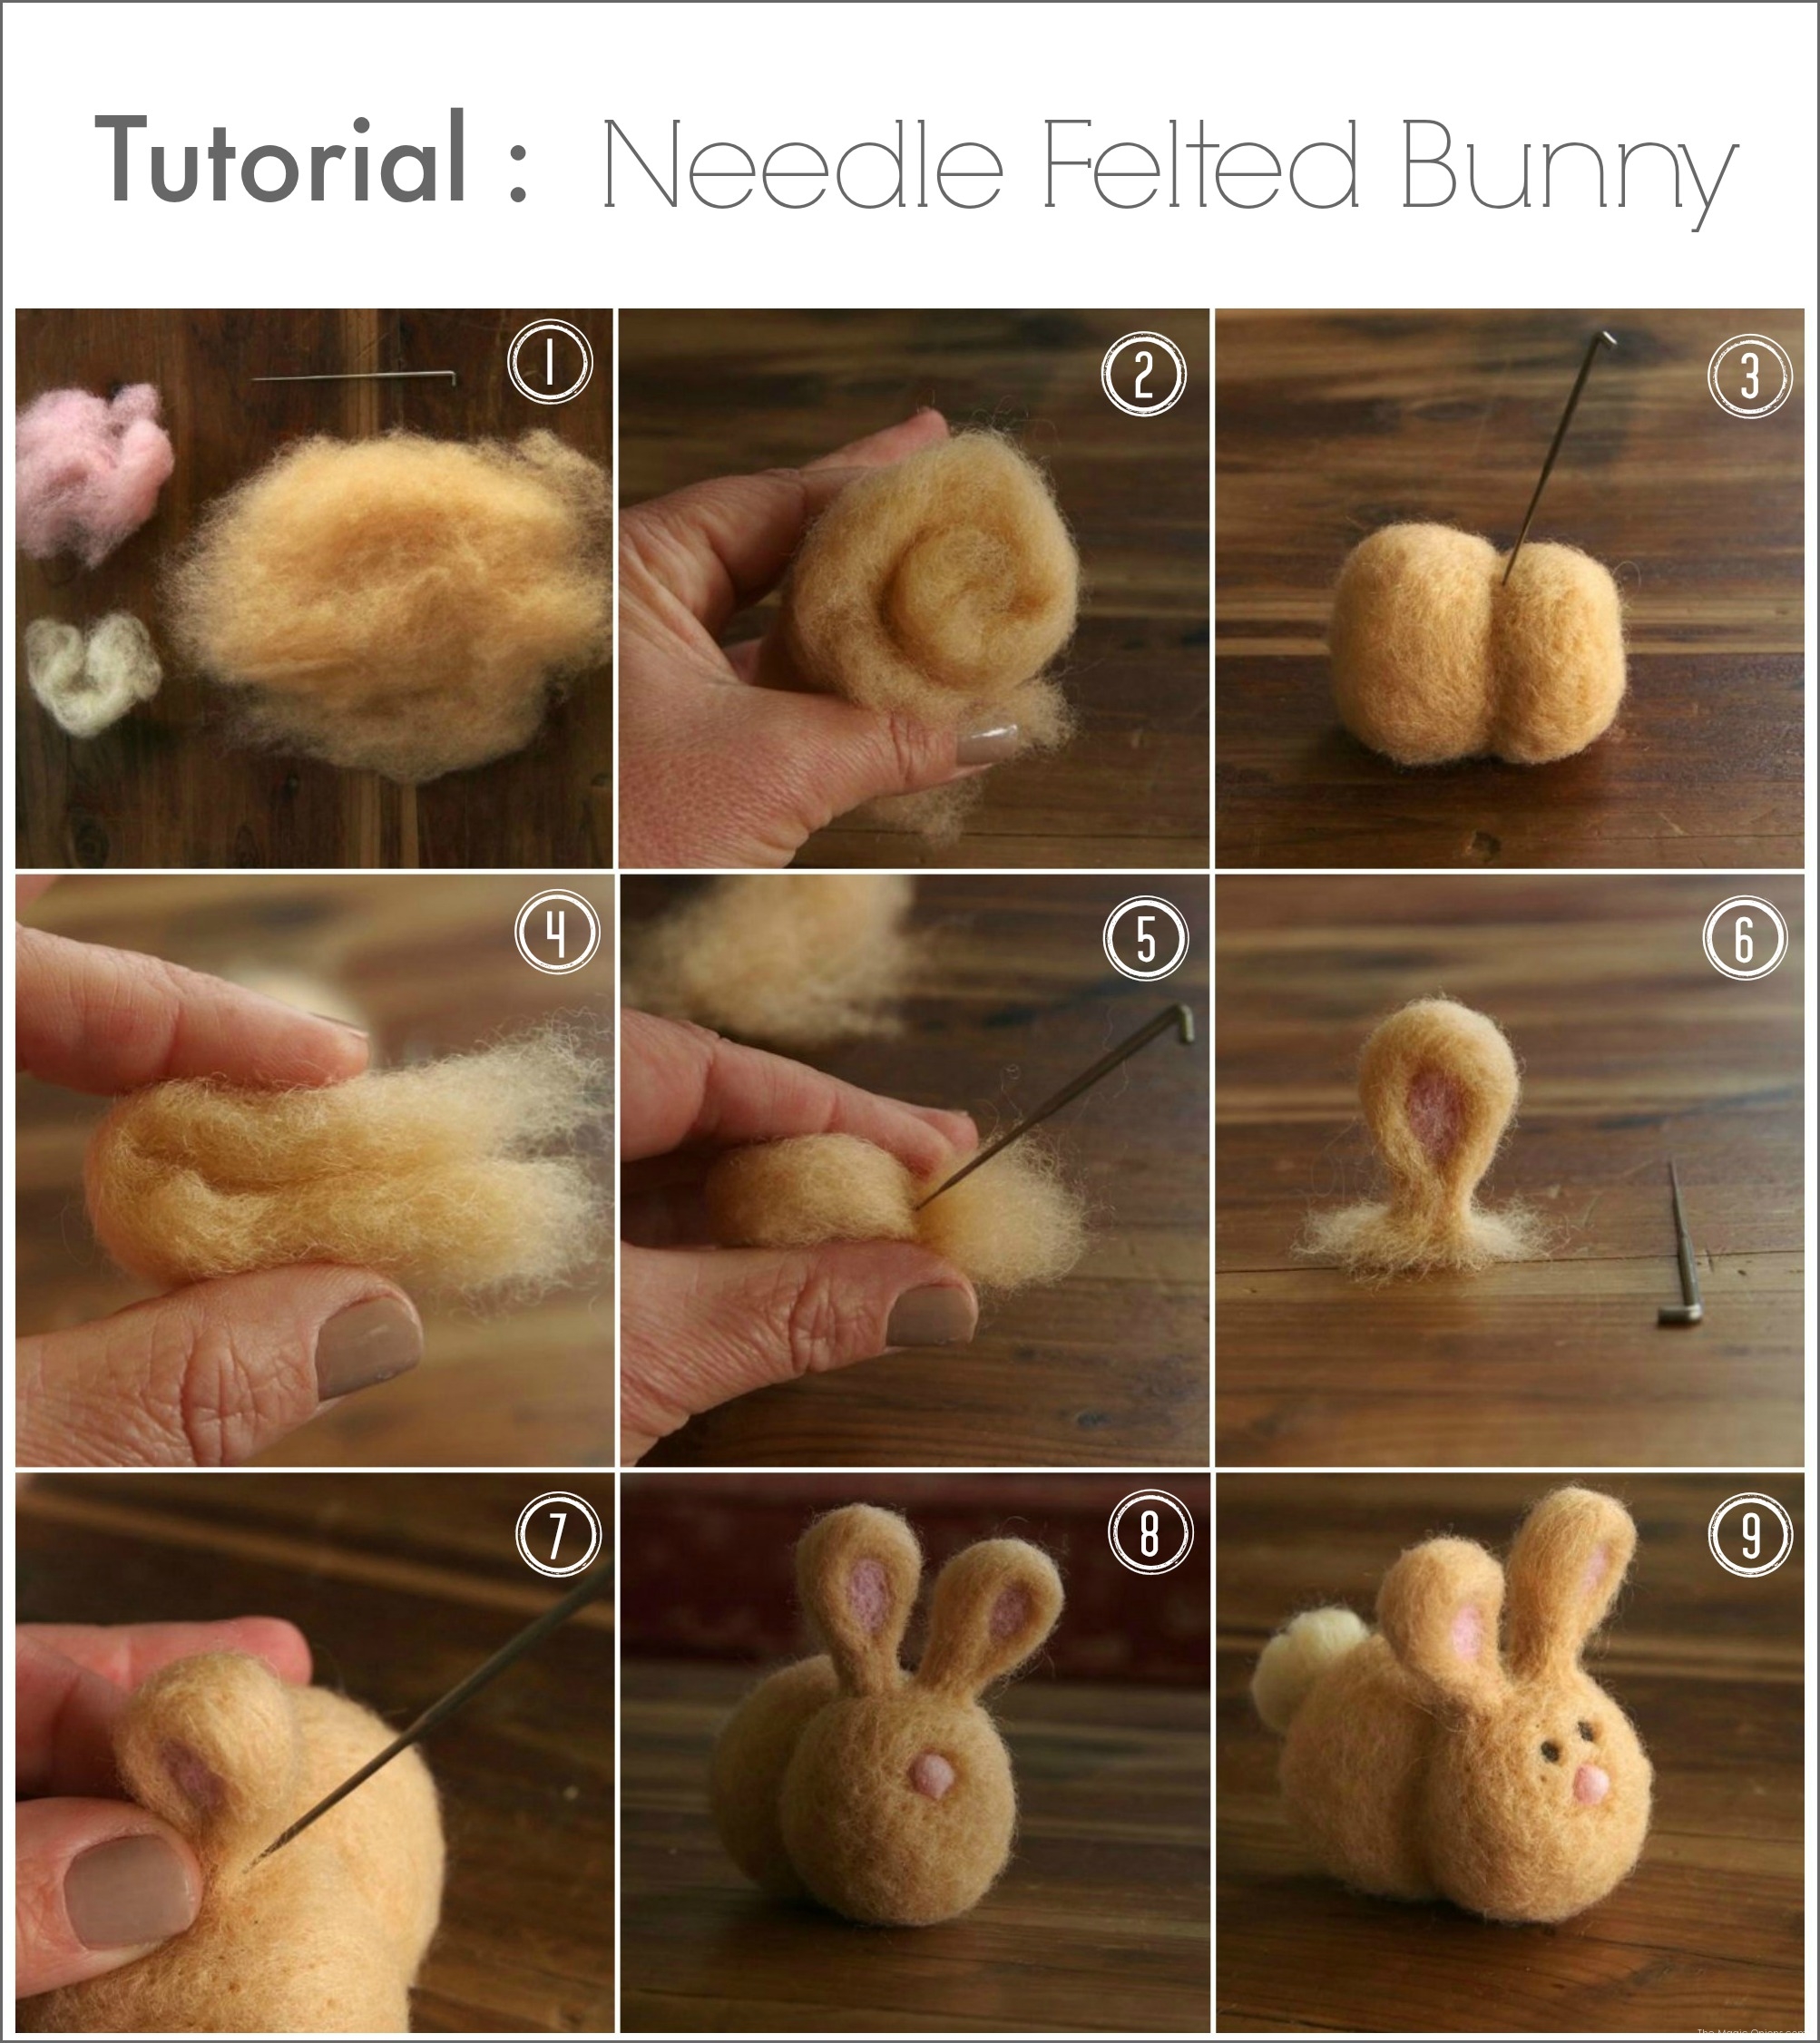
1. Roll the tan wool into a long spiral snake.
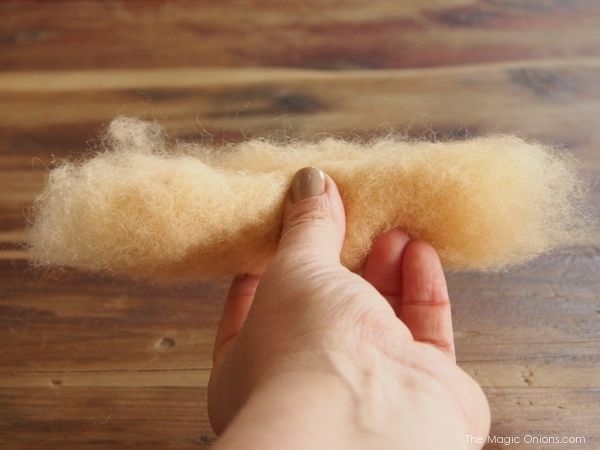
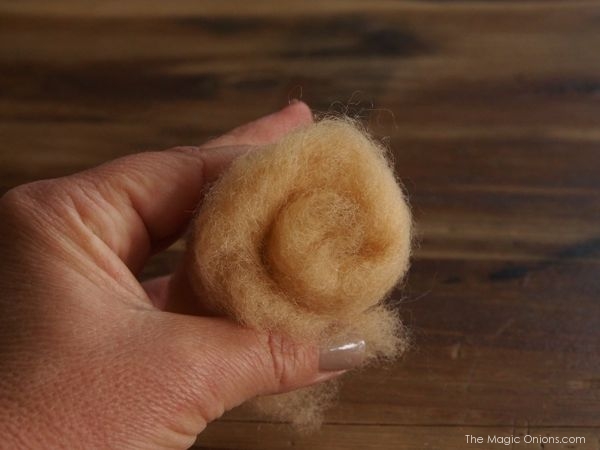
2. Turn the rolled up snake of wool 90 degrees and roll it again, the other way, into a another, smaller spiral. This will give you the shape of the bunny’s body without too much needle felting required.
TIP : Rolling your wool forms first in this method will cut down remarkably on your needle felting time.
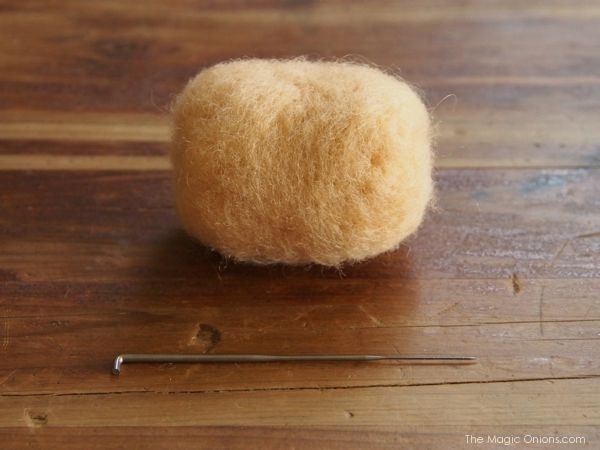
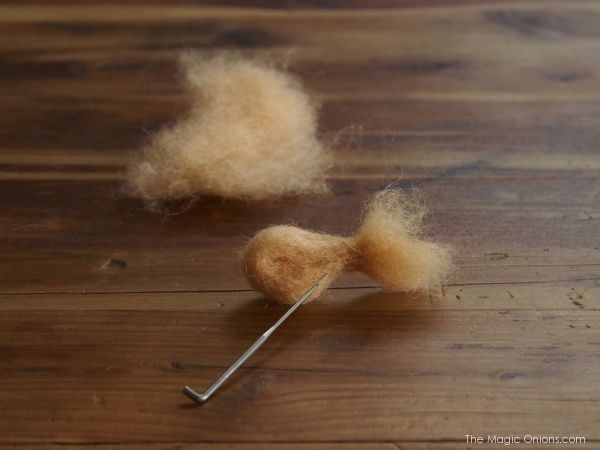
3. With your needle felting needle, felt all around the outside of your oval body shape. Needle felt around the ends to round them evenly.
4. At the 1/3 mark, needle felt a groove into the body for your bunnies head. Round the head.

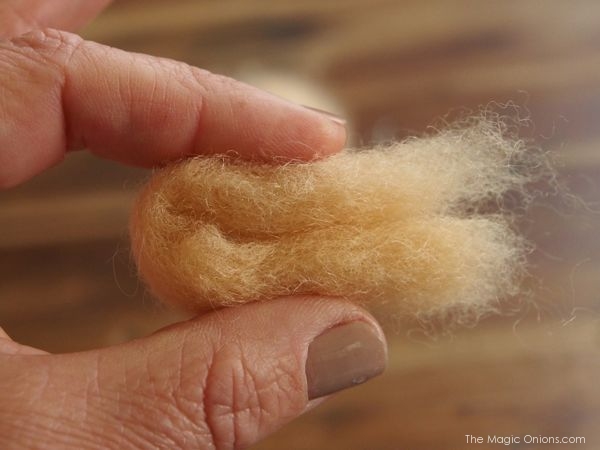
5. Now for the ears. Break off two tufts of the same tan roving. about the length of your needle and as thick as your finger.

6. Roll it between the palms of your hands (as you would roll a ball of palydough into a snake) until your wool resembles a long tube.

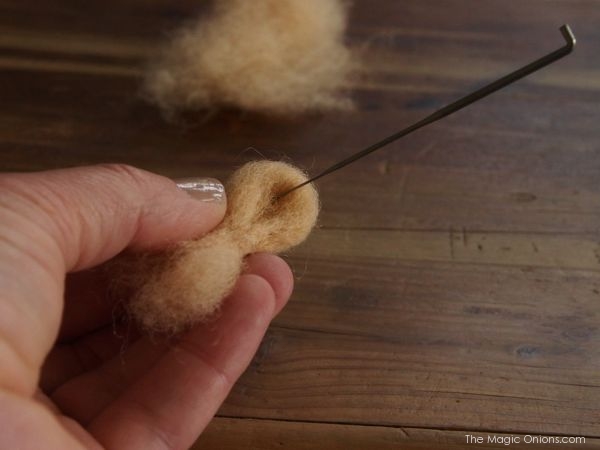
7. Bend the tube into a U shape between your thumb and forefinger – this will be an ear.
8. Still holding the ear between your thumb and forefinger, carefully needle felt along the base of the ear, leaving a tuft free at the bottom end to attach to the bunny’s body later.

9. Continue all around the base of the ear so that it is nice and firm.
10. Needle felt in the middle of the ear to make a little indentation.
11. Fill the center of the ear with a little pink wool.

12. Fan the fluffy end of the ear evenly and press against a hard surface. Trim short by pulling the fluffy wool.
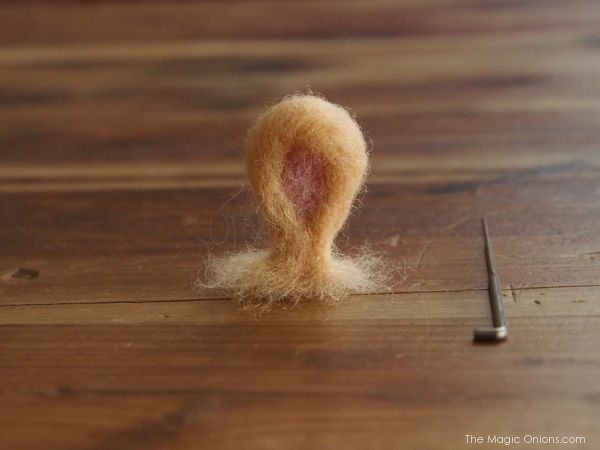
13. Set the fanned-out tufty end of the ear in place on the bunnies head and needle felt the fluffy wool firmly into the head.

14. Repeat with the second ear.

15. Roll the white wool into a ball and attach it to the rear of your bunny’s body.
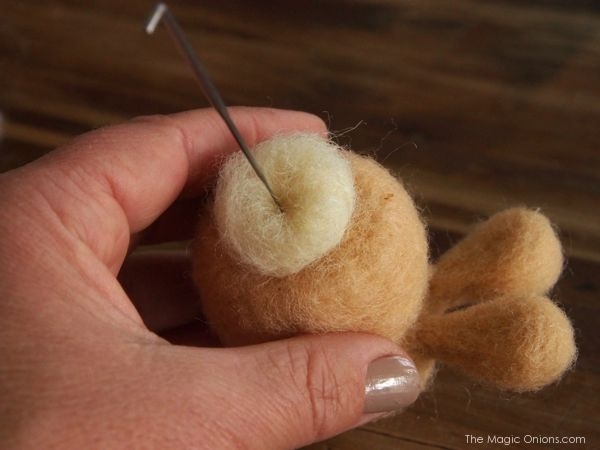
16. Now for the nose. Roll a little tuft of pink wool into a ball and needle felt it onto the front of your bunny’s face.


17. The eyes. Roll a little of the dark brown wool into a ball and needle felt it into place on the bunny’s head. Repeat for the second eye.

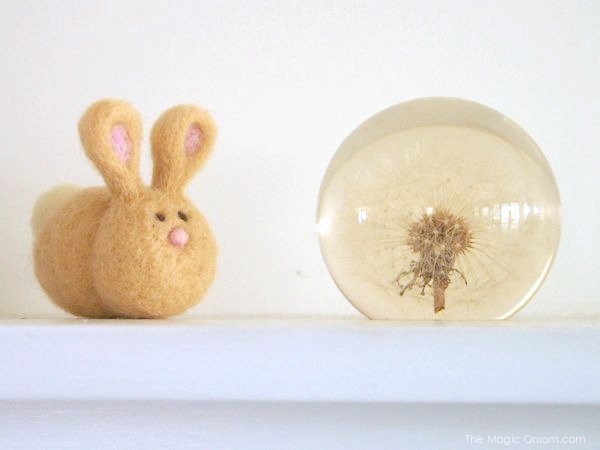
Voila!! The cutest little Easter bunny around.

The boy won’t let his new bunny out if his sight.

But when he’s not around, I can’t help laying with the sweet little ball of fluff myself.
Here’s a step by step graphic to help you through. Come on, you know you want to give it a go!
Note : I have many step-by-step needle felting kits, including this Bunny Rabbit Kit, available in my shop.
Happy Easter Crafting,
Blessings and magic,
Donni


7 Responses
This is wonderful! I think I would fall in love, too. Bunnies were what my lad collected when he was small.
Sandy in the UK
Thanks, Sandy… we do love our bunnies so!
xo Donni
So cute! And the tutorial is very helpful. I’ve never done any needle felting but have wanted to try. Thanks for sharing!
It’s surprisingly easy. I especially love that you can make something, from start to finish, in a short amount of time.
XO Donni
Great tutorial. And it does look interesting. I hope felting is as easy as it looks??
Enjoy, Nancy :)
I’d love to see a photo of what you make.
xo Donni
Love it just made my first bunny and it is also my first time doing needle felting.